Thursday, April 30, 2009

An Award!! Thank you Heidi!

I couldn't believe it when I opened my email this afternoon. I had a pleasant surprise from one of my good food blogger friends. She gave me the Passionate Blogger award. How sweet is that?! Go visit Heidi at Tried-and-True Cooking with Heidi and see what she has cooking. It is a great site! Thank you Heidi!


Ok now there are rules to this award, and here they are:

The Rules:
1. Put the logo in your blog
2. Write five things you are passionate about apart from blogging
3. Tag 5 people on your lists and let them know you tagged them.

5 things that I'm passionate about are:
- 1. My family - I love to feed them nutritious meals homecooked most of the time by me (that way I know what is in it and what it is all about) and I take care of them and raise my children the best I can. I have the best husband in the world in that he is very supportive, sweet, and he does housework (that is the bonus)
- 2. Cooking and baking is just a hobby of mine and I love it (which is why Cre8tive Kitchen was born). I am happy in the kitchen creating things my family and friends will enjoy.
- 3. Cake decorating is another one of my passions when I have time and an occasion to do it. I have done cakes for friends children's birthdays and every year I make and decorate special cakes for my own kids. They choose what they like and I make it!
- 4. My friends are wonderful. They are very supportive, funny, and just overall great. None of them have told me I suck as a blogger! haha even though some days I feel like it (probably because I need a new camera and want to take such cool pictures and I can't with what I have) but I try to make the best of what I have to work with!
- 5. Myself - What I mean by that is that I try to be the best I can be; such as being the best wife, best mother, best friend. I want to broaden my horizons by trying new things, especially food. I used to be a very closed minded person but am learning slowly but surely to open my mind about new things. I am still a work in progress.

Now I have to pass this on to 5 of my blogger friends who I feel are passionate about their blogging, this will be a hard choice since many of my friends and people I follow are very passionate about their blogs and I love them all.

1. Erin at $5 Dollar Dinners Her money saving tips are very helpful.
2. Chef Bliss She has wonderful recipes and fantastic pictures.
3. Tania at Love Big, Bake Often She is a new friend who has some wonderful recipes and is entertaining.
4. Mindy at Mindy's Mouthful She is a fun read and great recipes and information.
5. Kim at Ordinary Recipes Made Gourmet She just wrote an e-cookbook and it looks wonderful, she also makes regular recipes very gourmet. Great blog!

Check them out and give them some love, they certainly deserve it!!

Stumble Upon Toolbar

Sesame Ginger Beef

Asian food is always a big hit in my house. I had some beef stir fry meat lurking in the freezer from my last grocery shopping trip and when I decided what I wanted to make with it, it took some creative juices flowing in my mind to create my version of Sesame Ginger Beef. We didn't want the usual just beef stir fry so I concocted this recipe for the marinade, what I wanted in it based on what I already had on hand in my kitchen. Hope you enjoy it! We sure did!

Sesame Ginger Beef

Marinade:
1 cup beef broth
1/4 cup soy sauce
2 Tbsp vegetable oil
1 Tbsp toasted sesame seeds (toasting instructions below)
1 Tbsp sesame oil
2 tsp ginger
2 tsp ground ginger
1 tsp salt
1/2 tsp red pepper flakes
1 clove garlic, minced
1 lb beef stir fry meat

Mix together. Add meat to ziplock bag, and pour on marinade. Refrigerate 6 hours or over night.


2 cups broccoli florets
1/2 red pepper, diced
1/2 green pepper, diced
1 small onion, diced
3 stalks celery, diced fine
2 Tbsp vegetable oil

In a wok or fry pan, heat up the vegetable oil. Add red pepper, green pepper, celery, and onion. Stir fry until done, about 6-8 minutes.


Add the beef and marinade. When it gets hot and bubbly stir in a mixture of 1 Tbsp cornstarch and 3 Tbsp water to thicken.


About 6-8 minutes before serving, add broccoli. Put the lid on the let the broccoli steam until done. Stir in to get juices on broccoli just before serving. Serve over rice or soba noodles (we used rice).


Notes:
- You can also use 1 lb of round steak cut into thin strips for stir fry meat for a little less expensive meat. Or if you buy stew meat in bulk, save some chunks out for stir fry, and slice the chunks into thinner strips or chunks. Cut while partially frozen so it is easier to cut.
- To toast sesame seeds, place seeds in fry pan (no oil) and let fry until they start to pop and turn brown, takes just a couple minutes. Do a bunch at a time and cool them off and store in airtight container so you always have toasted sesame seeds when you need them.

Stumble Upon Toolbar

Wednesday, April 29, 2009

Crabby Deviled Eggs

This is sort of a late post about left over Easter Eggs. I made this right after Easter and am just now getting through what I need to post and get it on here. My family loves eggs, in any way, shape, or form; I cannot say the same, I loathe eggs but hubby cannot understand why I can prepare them so good if I do not like them. I don't know... probably because since they like them so well, I make egg dishes and snacks for them because I know they will eat it. These crab deviled eggs were no exception; they have a little zip and seafood (my older daughter is a crab freak, so I always keep a can of crabmeat around for her, she loves it on anything especially salad). This is a good recipe and well received by the family. It would make a great snack or appetizer to take to parties, picnics, or potlucks. Very easy to mix up, the majority of the work is peeling the eggs after they are hard boiled.

Crabby Deviled Eggs

12 hard boiled eggs
1/4 cup mayonnaise
1/2 tsp pepper
1 3.5 oz can crab meat, drained
1 tsp paprika
1/2 tsp salt
2 Tbsp prepared mustard
1 Tbsp chives, finely chopped
1/2 tsp parsley flakes
1/2 tsp red pepper flakes (if desired)

Cut eggs in half, scoop out yolks into a bowl. Smash egg yolks. Add mayonnaise, pepper, crab, salt, paprika, mustard, chives, pepper flakes, and parsley and mix well. Refill halved eggs with mounding spoonfuls of egg mixture. Sprinkle paprika on top. Chill.

Stumble Upon Toolbar

Tuesday, April 28, 2009

Berry Freezer Jam (any berry will do)


I love love love freezer jam!! Every summer when berries are in season, I buy up as much as I can afford for jam to try (try being the operative word here) to make enough to last us for the year. Never works. My family always eats it faster than I can make it. I have tried large containers, hiding containers in the freezer, rationing out jam... but they always find ways to use it up so fast, it leaves me with no choice but to buy jam (*hangs her head in shame*) from Costco; then of course they do not go through it as fast. I don't win no matter what I do in the jam department.

I make jam out of just about any berry I can get my hands on. The most popular being strawberry and raspberry. I even make a seedless raspberry, even though it is a lot more work; so, I do not make that very often. When making jam, I have found out that using liquid pectin works best for me. That way, I do not get clumps of powdered pectin lurking in the jam only to find it on your toast later. Yuck. (that has happened, cannot tell you how gross the texture was in my mouth). Along with strawberry and raspberry, I have also made blueberry, marionberry, as well as peach and apple. This year I am going to try pear freezer jam to see how that is since I always have an overabundance of pears.

I never use frozen berries because I just do not think it tastes the same, I don't know why, I cannot quite put my finger on it, but to me it does not taste the same. I buy all my berries locally here from the farms or Farmer's Market. Since we are in Washington, we have tons of varieties of berries during the summer and it is so wonderful! I just love berries!

The types of containers I use are Ball plastic containers with a screw on lid, I have found they are the best for my freezer jam and you can get them anywhere canning supplies are sold. They come in small (about 6-8 oz) up to big 32 oz size that is great for the strawberry and raspberry jam that my family just seems to wolf down with great vigor (basically they are a bunch of hogs!). I had a person email me asking me about jam and what I use, so I thought it was time for the freezer jam post.

Now the moment you all have been waiting for... (drum roll....) THE FREEZER JAM DIRECTIONS!! (cues applause)

I am just going to get to the berry freezer jam since I am unprepared and have not been able to find my peach and apple jam recipes (I am losing it, I never lose recipes, for shame...)

4 cups strawberries, raspberries, blueberries, marionberries, or any other berry that you like
3 1/2 cups sugar (approximately)depending on tartness of the berries, I may add more
lemon peel or orange peel, if desired; finely grated about 1/4 tsp
3 oz liquid pectin
2 Tbsp lemon juice

Crush berries. Add sugar, lemon or orange peel; let stand 10 minutes. (I do not know why, but my mother says do it anyway so ok I do) Mix together pectin and lemon juice; add to berries; stir for 3 minutes. Ladle into freezer containers leaving about 1/2 inch headspace. Affix lids, label, and let stand at room temperature for 2 hours or until jam is set. Lasts 3 weeks opened in the fridge or 1 year in the freezer.

Pretty simple and straight forward.

How I make seedless jam: I take my berries (usually only make raspberry seedless)I take the crushed berries and push them through a fine mesh strainer until all that remains is seeds. I could use one of those fancy seed remover gadgets, but I don't have one, and really want to invest in one. That is why I do not make this seedless jam very often, it is labor intensive and slow. Maybe this summer I will get me a thing that removes seeds. Enjoy the jam!

Stumble Upon Toolbar

Comparing Tomato Planters... which is better? My First Video Series

Everyone loves tomatoes. I know my family is no exception. But, tomatoes can be very expensive at the store. Here in Olympia, I pay $1.99/lb (on sale, usually they are $2.99/lb or somewhere in that neighborhood) for Roma tomatoes (or plum tomatoes) which is my favorite, I use them for everything. It is also better to grow your own, not only because it is cheaper but you know what pesticides or no pesticides, you know what fertilizer, what soil, you know everything about what you grow.

Have you heard of Topsy Turvy? I am shocked if you have not, it is all over the TV with short commercials advertising the newest sensation in growing tomatoes. What is the hype about? I have no idea, which is why I thought I would do an experiment. I am going to compare 3 different ways to grow tomatoes. One is the Topsy Turvy, the second is my homemade upside down tomato planter, and the third way (and is the control group) a regular pot growing tomatoes the right side up, which is what I am used to utilizing tomato cages the old fashioned way.

The main claims of Topsy Turvy are these:
- World's Easiest Way to Grow Tomatoes (we will see...)
- Simple to set up and maintain (I did not think so at all, and I have to get a stepstool to water it because the watering hole is so high, does not seem easy to me so far)
- Vertical grow bag heats the plant like a greenhouse so the root system explodes (so far I have found that it is so heavy that I wonder if it is not crushing the root system of the plant)
Eliminates weeding, caging, or staking (that is true since it is hanging up)

I am pretty new to the video game as you can hear in the video (I was sort of nervous and I wasn't even showing my face, unless you count seeing my reflection in my slider glass door). I am not that experienced at videoing anything, but that will change the more I get used to it and when I get a new camera. I thought it would be fun to do a weekly video series here at Cre8tive Kitchen. So kick back, watch the video, and learn to see if Topsy Turvy is better or a load of bull. Stay tuned weekly to find out! Welcome to week 1!


To make my own planter, I used an old hanging pot from my garage (the hanging part is lost so I had to improvise), some strong twine, 2 metal rings (I found them on my keyring, not sure why I have so many extra rings on my keyring, but cool for me for this project), 1 kitchen sponge cut into a circle with one cut halfway through the circle (it holds the plant in place so it does not fall out the hole in the bottom). Very easy to build. Building instructions on next week's installment of this video series.

Stumble Upon Toolbar

Monday, April 27, 2009

Garlic Fries - My Tribute to Seattle Mariners and Safeco Field


Take me out to the ballgame... in my living room when Seattle Mariner baseball comes on TV. This recipe is my recreation of going to Safeco Field for some fantastic Garlic Fries, which to me is one of the better dishes made at the ballpark. You can get this at Grounders in Safeco Field in 4 locations around the ballpark. Straight from the The Official Site of the Seattle Mariners our ballpark has been Nominated by Food Network for having the 'Best Ballpark Eats In America' and ranked by an ESPN poll as having the 'Best Signature Ballpark Food' (Ivar's Salmon and Hebrew National Kosher Hot Dogs), Safeco Field offers a wide variety of food sure to satisfy any taste. We feature numerous concession locations including 62 food stands, 26 kiosks, one restaurant and one pub. Food varieties are bigger and better than ever: Mariner Dogs, tacos, pizza, nachos, barbecue items, sushi, healthy alternatives, ice cream, espresso and much more (including, of course, beer and peanuts!). We are pretty proud of this title!!

So enjoy these fries as they are a signature dish of Safeco Field, Home of the Seattle Mariners! This is as close as I will come to their original recipe and they taste almost exactly the same, I think I did a pretty good job! Also, it made the house smell wonderful as I love the smell of garlic.

I used frozen fries with skins still attached, but who says you cannot hand cut your own fries and then shake the garlic mixture on them and bake or fry. I prefer baking myself. Next time I make them, I will be using fresh potatoes just like the ballpark does when they run their potatoes through a machine to cut them to perfect french fries for their Garlic Fries. Makes me really want to go see a baseball game now!


Garlic Fries
(inspired by the Garlic Fries at Safeco Field, Home of The Seattle Mariners)

frozen french fries, enough to cover a cookie sheet
1/4 cup olive oil
5 cloves of garlic, minced
1 tsp pepper
1 tsp sea salt

Shake frozen fries with the remaining ingredients. Pour onto cookie sheet, bake at 425 degrees for about 20 minutes. Serve hot! Eat while watching ballgame.

Notes:
- The dipping sauce shown in picture is my favorite fry sauce from my favorite restaurant Zip's in Spokane WA. It contains mayonnaise, ketchup (in equal portions) and 1 tsp paprika for each 1/2 cup of mayo and ketchup. That way you can make whatever portion of fry sauce you want.

Stumble Upon Toolbar

Adopt-A-Blogger... My Mentor, Teacher, Advisor

Dine and DishI have recently had the pleasure to participate in Adopt-A-Blogger sponsored by Kristen at Dine and Dish and so far having a lot of fun but also learning from my mentor (the person who adopted me) Jennifer Wilson who writes 2 blogs; Midwest Neurotica and Simple Scrapper. So far she has been very helpful and is so very nice! I appreciate all her help.

Since I am new to the world of blogging, I thought how nice it would be to have someone who actually knows what she is doing helping me out and give me suggestions which is exactly what Jennifer has done. I am working on changing Cre8tive Kitchen for the better with the suggestions I am receiving. So for the next 3 months, we will be undergoing some experimental things, some construction changes, and maybe you might see a whole new transformation of Cre8tive Kitchen. It only gets better from here!

As for our sponsor in this great event... she is awesome too so check out her site at Dine and Dish. She is such a nice person to actually organize something like this so the new people can get good at what they love to do. I appreciate you penciling me in at the last minute Kristen!

Stumble Upon Toolbar

Thursday, April 23, 2009

Anyone want free chocolate??

**4-28-09 The contest has concluded and a winner was chosen, please go to MyGourmetConnection to see who won!**

That's right FREE CHOCOLATE... if you win this giveaway at MyGourmetConnection.com. They are having a giveaway for a box of delicious Seattle Chocolates to one lucky winner!! (hoping that is me, but anyone has a chance to win)

If you have not tried Seattle Chocolates, you are sure missing out! Especially, the milk chocolate truffles; they are absolutely to die for (and I speak from experience, I have eaten a few in my day... ok quite a few). They also have a great variety of gifts for anyone and Mother's Day is coming up so grab a box for your favorite mom.

MyGourmetConnection.com is a great site for great food, nice recipes, and just a wonderful atmosphere over there. Check them out. Enter the contest. Get your chance to win some Seattle Chocolates. Life is sweet when you have chocolate!!

Details: (straight from MyGourmetConnection)
"This giveaway is open to residents of the U.S. and Canada. One entry per person. It will run from April 19, 2009 through April 27, 2009. One winner will be selected by a random number generator from all valid entries (those that follow the rules listed above). Winner must claim his/her prize within 48 hours of e-mail notification or a new winner will be chosen."

Stumble Upon Toolbar

Wednesday, April 22, 2009

Beer Battered Onion Rings

What better food to help kick off the Spring and Summer eating season than Beer Battered Onion Rings that pairs well with any BBQ'd food. These are good with ribs, chicken, burgers, or just about anything from the grill. This is my own homemade batter which is so versatile, you can make just about any kind of rings to go with any dinner. Here is just my favorite original onion ring batter and how it all comes together.

The best onion rings come from Walla Walla sweets which are not usually in season until sometime later this summer. So for now I used a Texas sweet onion and it worked very well. I got a really good deal on a 3 lb bag of Texas sweet onions so I thought I would kick off our grilling season with some onion rings. I think 3 lbs for 99 cents on sale was a good deal.

The dipping sauce is my version of fry sauce that comes from one of my most favorite restaurants as a kid growing up in Spokane WA called Zip's. It is just a combination of mayonnaise, ketchup, and paprika. Wonderful on onion rings or fries; they call it their Fry Sauce and it is one of the most tasty dipping sauces I have ever had. We love it! With the onion rings, you can also use any sauce for dipping such as honey mustard, BBQ, ranch (that is what my 4 yr old eats on everything), spicy mustard, or whatever catches your fancy.

Beer Battered Onion Rings

2 cups flour
1 bottle beer (your favorite flavor, I used Bud for this one)
2 tsp paprika
1 tsp pepper
1 tsp salt
1 tsp baking powder
1/2 tsp chili powder (for just a little zing)
4-6 sweet onions
Vegetable oil

You want to make the batter at least 6 hours ahead of time and let it sit at room temperature. Mix all ingredients until batter is no longer lumpy, cover and let sit at room temperature. I make mine the same morning as my meal. Thin with a little water or more beer if batter is too thick at cooking time, but not too thin or the batter won't adhere to the onions.


Slice up your onions and place in a large bowl of cold water, and refrigerate until ready to coat and fry. I usually slice up my onions right after I make my batter. The water helps the thin film come off the onion slices, which can make your onion rings very stringy and sort of slimy with that film intact.


Heat up your oil in a large frying pan on medium-high heat; or prepare deep fryer. Fry about 2 mins each side or until golden brown. Drain on paper towels (see tip below), keep in 180 degree oven to stay warm and crunchy.


Serve with favorite dipping sauce.

Tips:
- when I drain my onion rings, I use a wire rack so the rings do not sit directly on the paper towels, the oil drips down onto the paper towels and then I just convert them to another dish to keep warm in the oven, it really cuts down on the oil factor so you just taste onion and batter and not the oil.

Stumble Upon Toolbar

The Simplest Grilled Chicken Ever!


It doesn't get any simpler than this. We love chicken, we love chicken on the BBQ; however, we don't always love smathering with BBQ sauce every time we turn on the BBQ (I know this is hard to believe). So with this chicken we marinated it in Italian salad dressing and a few spices and it was soooooo good! Simple, yet effective! Richard has a way with the BBQ and he grilled this chicken to perfection. The key is letting it marinate long enough for the flavors to permeate the meat so you get a nice tangy flavor throughout the chicken. We usually marinate this minimum 12-24 hours. It just starts with a bottle of Bernstein's or your favorite Italian dressing...however, this time we used Paul Newman's Italian Dressing and it was still fantastic!

Simplest Grilled Chicken

2-3 lbs chicken pieces
1 bottle of Italian salad dressing (any kind will do)
1 Tbsp lemon juice
1 tsp black pepper
1 tsp salt
diced onion, green pepper, red pepper (optional, just gives it extra flavor in the marinade)

Mix together dressing, lemon juice, pepper, salt and veggies (if veggies are desired). Toss with chicken in plastic bag; marinate 12-24 hours or longer. Grill for about 40 minutes, turning periodically or until done. Poke thermometer in meatiest part of chicken to reach 165 degrees. Serve and enjoy!

Stumble Upon Toolbar

Monday, April 20, 2009

Chicken Yakisoba

When my husband decided to cook dinner last week, he chose a wonderful recipe from AllRecipes.com. It is a tasty Chicken Yakisoba that tasted so good after driving all day with 2 kids in the car. We had just got home from vacation right around dinner time and he was sweet enough to be cooking me this great meal. I had been on vacation with my kids visiting my dad in Spokane WA and it was a long drive home since the kids were restless and tired from so many activities on their spring break from school. It was so nice to come home to a hot meal that I did not have to cook. I highly recommend this recipe and here is the link: Chicken Yakisoba if you do not want to print it from here.


Chicken Yakisoba

* 1/2 teaspoon sesame oil
* 1 tablespoon canola oil
* 2 tablespoons chile paste
* 2 cloves garlic, chopped
* 4 skinless, boneless chicken breast halves - cut into 1 inch cubes
* 1/2 cup soy sauce
* 1 onion, sliced lengthwise into eighths
* 1/2 medium head cabbage, coarsely chopped
* 2 carrots, coarsely chopped
* 8 ounces soba noodles, cooked and drained

1. In a large skillet combine sesame oil, canola oil and chili paste. Stir fry 30 seconds. Add garlic and stir fry an additional 30 seconds. Add chicken and 1/4 cup of the soy sauce and stir fry until chicken is no longer pink. Remove mixture from pan, set aside and keep warm.
2. In the emptied pan combine the onion, cabbage and carrots. Stir fry until cabbage begins to wilt. Stir in the remaining soy sauce, cooked noodles and the chicken mixture to pan and mix to blend. Serve and enjoy!

Tips:
- The only 2 things Richard did different is he used some toasted sesame seeds on top, which were not called for in the recipe, but it added a nice nutty flavor to this yummy dish. He also added some diced green onions on top because he said he wanted to make it look pretty so I could photograph it.. how sweet is he? He is pretty awesome!

Trust me... this is a great recipe!! Give allrecipes.com some love while you're at it!!

Stumble Upon Toolbar

Choco-Berry Trifle Parfait


Here it is... post #150! The time sure does fly! Since it is finally spring here in Pac NW, it is time for spring recipes using berries that will be in season shortly here. Usually our strawberry season is June.. that is it, just the month of June and I am looking forward to it (unless you live anywhere it is warm and have local strawberries year round, but here in Olympia WA, our season is just June). Local strawberries, what could be better for yummy warm weather treats. This dessert is wonderful on a warm day, with the mix of chocolate and strawberries it is sure to become a family favorite!

Choco-Berry Trifle Parfait

1 loaf of poundcake, cubed (you can use a store bought cake or make your own)
Strawberries; hulled, washed, and sliced
1/2 cup sugar
prepared chocolate pudding
whipped cream

Cube up the poundcake. Wash, hull, and slice strawberries; add sugar and mix. Prepare the pudding according to package directions. Whip the whipping cream (if you have used heavy whipping cream instead of aerosol whipped cream)

Layer dessert glasses with poundcake on bottom, then pudding, then stawberries, then whipped cream. Repeat until glass is full. Whipped cream on top and garnish with a strawberry and maybe some chocolate shavings if desired.

Enjoy! Repeat directions above if still hungry!

Stumble Upon Toolbar

Sunday, April 19, 2009

Apple Crumb Pie

Apple Crumb Pie just like a remembered as a kid. When we would go to my grandmother's house for Sunday dinners, this would be for dessert. She was such a great cook and I am happy to remake this again and again for my family. The tang of the apples goes great with the sweet of the crumb topping as it should. This is her recipe from the quite sizeable box of recipes I received after she passed away. I am happy to share this with everyone and hope it becomes a family favorite also.


You can do a couple twists on this recipe as I have experimented with in the past, such as adding raisins or dried cranberries to the apples to give more texture and a different taste to this old classic. Serve it warm with vanilla ice cream or turn this into a caramel apple pie, it doesn't matter; it still tastes wonderful however you prepare it. My youngest daughter loves this with just a dollop of whipped cream and it is fabulous! So enjoy the recipe, and comment back with any twists you may put on this recipe, I would like to know!

Apple Crumb Pie
(original recipe by my grandmother Audrey Stewart RIP 1912-2008; all tips in parentheses are my own instructions and ideas and not part of the original recipe)

Filling:
5 apples; peeled, cored, sliced (I use granny smith apples because they are most tangy)
1 Tbsp flour
1/2 cup sugar
1/2 tsp nutmeg
1 1/2 tsp cinnamon
Topping:
1/2 cup brown sugar
1/2 cup flour
1/4 cup chopped nuts (I used pecans, that is my favorite nut for pies but you can use whatever nuts you want, if you want)
3 Tbsp butter (not margarine)
Crust:
use your favorite recipe for pie crust, or can use premade pie shells

Preheat oven to 375 degrees. Line pie plate with crust. Peel, core, and slice apples into large bowl. (in between apples, I sprinkled a little Fruit Fresh and gave it a fast stir to help the apples not to turn brown). Add sugar, flour, nutmeg, and cinnamon. Mix well. Pour apples into pie plate. For topping, mix brown sugar, flour, and nuts in bowl. Cut in butter (make sure it is cold butter) until mixture resembles coarse crumbs (about pea sized). Put this mixture on the apples. Wrap foil around edges of crust to prevent burning. Bake 25 minutes. Remove foil. Bake 25-30 minutes longer. Cool on wire rack.

Extra Variations:
- Add 1/2 cup raisins or dried cranberries for more flavor and texture, add to the filling.
- If you want icing or a drizzle; a thick powdered sugar icing, cream cheese icing, or a caramel drizzle can be used
- Serve warm with vanilla ice cream, or a dollop of whipped cream on top if desired.
- Can be made ahead and frozen; just bake at 325 degrees for 1 hour 20 minutes, putting foil on edges for first 40 minutes, then remove and continue baking until done, checking bottom of pie plate for doneness of middle of bottom crust. Adjust times accordingly if needed.

Stumble Upon Toolbar

Saturday, April 18, 2009

Lemon Blueberry Buttermilk Pancakes

Lemon + blueberry = the most wonderful taste combination ever! Which is what we had for dinner the other night. We had breakfast in the form of Lemon Blueberry Buttermilk Pancakes. I also made Lemon Butter and Blueberry Cream Cheese Spread to go with it. It was fantastic! So I am going to share my recipes with you all here today. This would make an excellent Mother's Day or Father's Day breakfast; or, just whenever you get the craving for some awesome pancakes! So this post is a 3 in 1 recipe collage, totally heavenly put together in this dish. Enjoy!


Lemon Blueberry Buttermilk Pancakes
(an adaptation of my usual buttermilk pancake recipe straight from my Better Homes and Gardens cookbook)
2 C flour
2 Tbsp sugar
2 tsp baking powder
1 tsp baking soda
1/2 tsp salt
2 eggs, beaten
2 C buttermilk
4 Tbsp vegetable oil
1 C blueberries (drained, reserving about 1 Tbsp juice if your blueberries have juice; if not than you can skip the draining and reserving)
1 Tbsp fresh lemon zest, or 1 Tbsp lemon curd, or both (depending on how much lemon you want)

In a large bowl, combine flour, sugar, baking powder, baking soda, and salt; set aside. In another bowl, combine eggs, buttermilk, vegetable oil; mix well. Add wet ingredients into dry ingredients and combine well. Add lemon zest/lemon curd and mix well. Gently fold in blueberries and juice (if juice is desired) and gently mix. Cook on preheated griddle (about 400 degrees) until golden brown. Serve with Lemon Butter and Blueberry Cream Cheese Spread (recipes following)

Lemon Butter


1/2 cup butter, softened (do not use margarine)
1/8-1/4 cup lemon curd (depends on how much lemon you want)
1/4 cup powdered sugar

Mix well and refrigerate.

Blueberry Cream Cheese Spread


1 8 oz package cream cheese, softened
1/4 cup blueberries, chopped in food processor or blender
1/4 cup powdered sugar

Combine all in a bowl until we mixed. Refrigerate.

Tips:
- Blueberry Cream Cheese Spread and Lemon Butter can also be eaten on toast, bagels, or english muffins for breakfast.
- Pancakes can be frozen in individual baggies (usually 2 per bag) and toasted in a toaster later for quick breakfasts.

Stumble Upon Toolbar

Thursday, April 16, 2009

Mocha-zazz BBQ Rub

I love BBQ rubs on meats! They make the meat taste so yummy and really tenderizes some cuts. If you let the rub sit on the meat overnight, it turns into something really special because it oozes yumminess! With coffee in the rub, it turns it to Mocha-zazz and gives a rich nutty flavor to the meat. The pilot run of the Mocha-zazz rub was on pork loin roast. I baked it in the oven since the BBQ has since run out of propane (Richard needs to get some more) and it was wonderful so here is what I did:


Mocha-zazz BBQ Rub

1/4 cup paprika
1/4 cup Kosher salt
1/4 cup brown sugar
3 Tbsp granulated garlic
2 Tbsp chili powder
2 Tbsp coffee (right from the can, not instant)
1 Tbsp black pepper
1 tbsp season salt
2 tsp ginger
2 tsp onion salt
1/4 tsp cocoa powder (you do not need much, since it is a strong flavor but meshes well with the coffee and other seasonings)
dash nutmeg

Mix together and put into ziplock bag and label. Keep in dry cool place.

Use your favorite meat (I used pork loin roast) and rub liberally all over all of the meat. Refrigerate overnight for best flavor.

When I did the pork roast, I preheated the oven to 325 degrees. I baked the pork for 2 hours. Let it stand for 20 minutes. Slice and enjoy!

Stumble Upon Toolbar

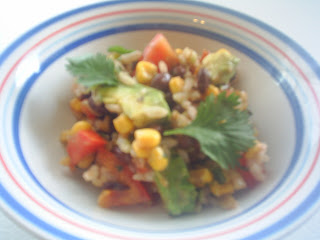
Southwest Corn and Black Bean Salad

When searching for a nice salad for Cinco de Mayo, try this Southwest Corn and Black Bean salad that I concocted last night. It has a pleasing assortment of rice, corn, black beans and wonderful fresh seasonings. I was trying to find something to go with the quesadillas that wouldn't be too heavy but rather on the lighter side. It is a great cold salad that you can also take with you to potluck, picnics, or where ever you want to take it. It went over well with the family, since we do not usually have southwestern food. I was pleased with the final result and here is the recipe I made up.


Southwest Corn and Black Bean Salad

1 avocado (diced)
2 tsp lime juice
Dice up the avocado and add lime juice, mix to coat. Refrigerate. (it helps the avocado not to turn brown while preparing the rest of the salad)
1 1/2 cups cooked rice (cook according the package directions; I used Arborio rice as I like that better, but any rice can be used)
1 can (15 oz) black beans; drained and washed
1 can (15.25 oz) corn; drained
2 Tbsp chopped fresh cilantro
2 cloves garlic; minced
2 Tbsp lime juice
2 roma tomatoes; diced
1 tsp black pepper
1 tsp salt
1/4 cup southwestern salsa
2 Tbsp green chiles (either from a can, or fresh chopped)

Mix together all ingredients and chill until ready to eat.

Stumble Upon Toolbar

Lime Chicken Quesadillas


Last night, I was craving something of the Southwestern flavor. I have seasoning packets from Amazing Taste along with recipe cards from them and I came up with an adaptation of their recipe card (the recipe on the card I have is also on their website) for Lime Chicken and turned it into Lime Chicken Quesadillas. They were fantastic with just the right amount of lime and southwest seasonings to make the perfect chicken for these quesadillas. If you celebrate Cinco De Mayo than this is a great dish for that. I served it with some southwestern salsa I got at the store and it was a hit for the family. I also made a cold corn and black bean salad that got rave reviews from the family also (which is another blog post coming up soon).

I strongly urge people to pick up these Amazing Taste Seasonings because they are economical and so easy to use. They make food taste AMAZING! You do not have to be a gourmet chef to make something fantastic with these packets. With my quesadillas, I used the simple poultry seasoning.


Lime Chicken Quesadillas

4 boneless skinless chicken breasts
1 packet of Amazing Taste Poultry Seasoning
1/3 cup lime juice
3 Tbsp olive oil
1/2 tsp fresh lime zest
1 Tbsp chopped cilantro
1/2 tsp black pepper
1/2 tsp salt
2 cups shredded cheddar cheese
10 flour tortillas
southwestern salsa (optional)
sour cream (optional)

Mix up all ingredients except chicken, cheese, tortillas, and salsa. In a large ziplock bag, combine the chicken with the marinade and let sit for at least 4 hours or overnight in the fridge. Preheat oven to 350 degrees. Spray square baking dish with cooking spray and put marinated chicken in the dish. Bake 30 minutes, then turn. Bake 30 minutes more until done. Slice into thin strips for the quesadillas.
Spray griddle or frying pan with cooking spray. On one flour tortilla place some of the chicken and cheese, top with another flour tortilla. Cook until brown on both sides and cheese is melted. Repeat with remaining ingredients. Serve with southwestern salsa and sour cream if desired.

Stumble Upon Toolbar

Monday, April 13, 2009

Dill and Lemon Tilapia

Another winner by Amazing Taste in this Seafood Seasoning I received from them with my tilapia. The seasoning made into a marinade (I just used the instructions on the back of the package) was one of the best I have had for fish. It had just the right amount of dill and lemon to make this a winning combination for a fast easy dinner. I had 4 tilapia fillets in the freezer from our last Costco trip and decided I wanted to try their marinade. It was hands down wonderful, the whole family loved it.

At 99 cents a package, this makes a wonderful addition to any meal. You can use this as a sprinkle on seasoning, or follow the directions on the back of any of the packages for marinades or meatloaf (on the back of the burger seasoning packet). In this economy, Amazing Taste has made it affordable to make great meals for the family for a very low cost. Add this to your favorite meat today and watch your meals come alive! For the seafood seasoning, you can season any fish, shellfish, and scallops.

Here is what I did:
Dill and Lemon Tilapia
(using the instructions for marinade on the back of the package)

4 Tilapia fillets
1 packet of Amazing Taste Seafood seasoning (just follow the instructions on the back of the package for marinade)


Preheat oven to 400 degrees. Combine ingredients for marinade as directed on the back of the package. Let tilapia marinate for at least 5 minutes. Bake for 20 minutes. Garnish with favorite herbs, lemon slices, or extra dill.

This fish was wonderfully flaky with amazing flavor in the marinade.

Tips:
- If you do not want it very lemony, take the lemon juice down to 2 Tbsp and add some more fresh dill.
- This would be an excellent recipe to have a little dollop of sour cream on top. I didn't think of it until after we ate all the fish. But, next time I am trying that.

So you can get this at your favorite supermarket in your area by clicking on Amazing Taste and then going to store locater and you can find a store near you to purchase this product. Or else, go to the website and order it from there, they have many flavors of seasoning packets or shaker cans for other types of seasonings at very reasonable prices. So far I am 2 out of 2 in enjoying their great products. I look forward to trying the rest of the seasoning packets.

Stumble Upon Toolbar

Sunday, April 12, 2009

Meatball Tater Tot Casserole

It is different! I thought my husband was crazy when he told me about this dish that my best friend makes and made while he was there visiting a few months ago (Deanna, let me know if I need to add anything else, just email me or on facebook, love ya hunny!). I thought to myself "what a strange combination of ingredients." But, he raved about it and told me what was in it so I concocted what I thought it would taste like with what he told me was in it, and it was very good. So, I am going to share it here. It is just a fast and easy idea for a dinner; serve it with some bread and salad and makes a great meal. I call this meal "the I do not feel like cooking" meal. It is just that easy!

Meatball Tater Tot Casserole
(a recreation of a friend's dish based on what hubby told me was in it)

Tater Tots (enough to cover the bottom of a 13x9 casserole dish)
frozen meatballs (about 20)
1 can cream of mushroom soup or cream of celery soup
1 cup sour cream
1 tsp black pepper
1 tsp granulated garlic
1 cup shredded cheddar cheese

Preheat oven to 350 degrees. Spray 13x9 inch casserole pan with cooking spray. Pour frozen tater tots into casserole dish (enough to cover the bottom with none on top of each other). Mix together the cream of mushroom or celery soup, sour cream, pepper, and garlic; add frozen meatballs and stir to coat meatballs. Pour this into the casserole dish on top of tater tots. Top with shredded cheese. Bake 40 minutes. Let stand about 5 minutes. Serve and enjoy!

Tips:
- I used cream of celery soup because I am allergic to mushroooms and it was good even though the original recipe calls for cream of mushroom.
- I think it would be nice and colorful to garnish with chopped green onions after baking (I didn't think of it until after we ate the meal)
- My husband thought that next time we try it, to add some crumbled bacon.

Stumble Upon Toolbar

Monday, April 6, 2009

Just For Fun: Check out this Peeps creation

I just came across this flickr page through my facebook and thought I would share the link. People can sure get imaginative around the holidays (Easter specifically) that all kinds of things are done to Peeps. I thought this really took some great initiative and creativity. It is very colorful and neat. Check it out!

Master-peeps theatre

This is a creation by CakeSpy. It is also a phenomenal blog to read. Check it out!

Stumble Upon Toolbar

Sunday, April 5, 2009

Inside-Out Cheeseburgers

Well, Spring has officially sprung here in the Pacific Northwest; finally, we decided to break out the BBQ today since we had 70 degree weather here (wonderful after having snow just last week) and whip up some burgers. I have always wanted to try something new with my burgers but, Richard never wanted to (he likes burgers just the way they are supposed to be as in cheese on top of the burger, not inside). So I snuck in the cheese and bacon in the middle of the patties and he was none the wiser; until he bit into it! But he really liked it, but it had to be something else other than cheese and bacon in the middle (oh and the cheese he had to put on top of the burgers like he always does anyway, even though the cheese is supposed to be in the middle and not on top with these burgers, but whatever makes the hubby happy!). In the meat itself is a great ingredient that made these burgers so flavorful, they were just amazing. I used a packet of Amazing Tastes Burger Seasoning mixed into the meat and it gave it so much flavor that it was one of the best burgers I have tasted. I highly recommend going and getting some of this seasoning at your local supermarket or if they do not have it, just order it online from their site. At just 99 cents a packet, that has to make a wallet happy since seasoning packets are getting so expensive in this economy. It makes a lot of sense to get what is inexpensive, especially when it tastes so good... It is so good, it is AMAZING! Now, on with the recipe.

Inside-Out Cheeseburgers

2 lbs ground beef
1 packet Amazing Taste Burger Seasoning
1 cup breadcrumbs
1 egg

Cheddar cheese
Bacon

Mix together ground beef, seasoning packet, bread crumbs, and egg. Set aside.

Slice cheddar cheese into squares about 1/2 inch thick, set aside.
Cook bacon until done, pat the grease out of bacon with paper towels. Cut into 2-3 inch pieces.

Forming patties:
Take about 1/4-1/2 cup meat mixture and form a flat patty. Then put 1-2 slices of cheese on top of that, and then 2 slices of bacon. Take 1/4 cup meat mixture and place on top and pat the ends together so you have a patty making sure that you cannot see the cheese, this way it seals the cheese in the middle and it won't run out while BBQing or broiling.

Cook about 10-13 minutes on BBQ (6-7 minutes on each side) or about 6 minutes each side under broiler. Make sure you only flip once, a lot of flipping could make them fall apart. Place cheese on top if desired for double cheeseburger effect. Enjoy!

(once again, sorry about the picture being sort of foggy, like I said many times before... I need a new camera.)

Tips:
- You can use any type of cheese, we just used cheddar since that was in the fridge. But I think a good combo would be pepperjack and jalapenos inside with a guacamole topping for a Mexican burger, just for one example.

Stumble Upon Toolbar

Chocolate Cranberry Cookies

This is the cookie that I made for a treat at my daughter's orchestra concert last week. They were a hit, we did not have any leftover to take home. Good thing I saved a few out before the concert. These are Chocolate Cranberry Cookies, and it is an adaptation of a recipe I found on the Baker's Chocolate Website. There is a wealth of information on the packages of products in the pantry. When I am choosing things to make or bake, I check the package to see if they have a website, and then check current recipes. Sometimes I find something I can make with ingredients on hand, and then throw my own twist on that recipe. As in with this recipe, instead of the nuts I added dried cranberries. They were fudgy, chewy, and yummy!!


Chocolate Cranberry Cookies
(an adaptation to Baker's Chocolate for the Double-Chocolate Chunk Cookies; my variations are at the bottom after the recipe; this is the recipe from the website, they also have a lot more great recipes)

1 pkg (12 oz) Baker's semi-sweet chocolate chunks, divided
1 cup flour
1/2 tsp baking powder
1/4 tsp salt
1/2 cup (1 stick) of butter or margarine, softened
1/2 cup firmly packed brown sugar
1 egg
1 tsp vanilla
1 cup chopped walnuts

Preheat oven to 375 degrees. Microwave one cup of the chocolate chunks in microwaveable bowl on high 2 min or until chocolate is almost melted. Stir chocolate until completely melted; set aside. Mix flour, baking powder, and salt until well blended; set aside.

Beat butter and sugar in large bowl with electric mixer on medium speed until light and fluffy. Add egg and vanilla; beat until well blended. Stir in melted chocolate. Add flour mixture; mix well. Stir in remaining chocolate chunks and the walnuts. Drop heaping tablespoonfuls of dough, 2 inches apart, onto ungreased baking sheets.

Bake 10 minutes or until chocolate cookies are puffed and feel set to the touch. Cool on baking sheets 1 minute; transfer to wire racks. Cool completely.

Cre8tive's Variation on this recipe:
- I used one 12 oz package of dried cranberries in place of the nuts
- I used 1 box of Baker's semi-sweet chocolate squares (since that is what I had on hand) and chopped 4 squares for the chunks in the cookies and 4 squares to melt, it turned out wonderful.
- Then I followed the instructions just like it says on the recipe.

Stumble Upon Toolbar

Saturday, April 4, 2009

Just for Fun: What happens to a Peep in the Microwave?

Since Easter is coming and Peeps are plentiful in the store (well at least until a couple days before Easter I never can seem to find them a couple days before Easter), I thought I would have some fun with my youngest daughter. We thought we would see what would happen to a peep in the microwave. This is fun for those of you who do not actually eat the peeps; but then again, even if you eat the peeps, this could be fun for you too. We didn't go as far as actually exploding them in the microwave, but we blew it up to the point of almost exploding. We were very curious about how long it would take to blow one up to 3-4 times its normal size. We found it does not take long at all since we have an 1100 watt microwave. It took us about 35 seconds. Imagine the delight of my 4 yr old watching the peep grow in size right before her very eyes, the excitement on her face was priceless. Here is what we found:

A peep in the microwave after about 15 seconds:


A peep in the microwave after about 35 seconds:


You can see here the difference between a regular sized peep, and one that was heated in the microwave. I think it is about 3 times its normal size, that is my observation anyway.


What is the point some would ask? Well, there is no point, we just did something just for fun since it is one of the Peep seasons. Gotta have fun in the kitchen sometimes. So I ask the question of readers: What is your favorite thing to do with Peeps? If you have some off the wall thing you do with Peeps, email them to me with pictures and I can post them here in the Just For Fun category here on my blog. Leave me a comment if you have no pictures, or if you have pictures email them to me at pacnwfamily1@comcast.net. I look forward to hearing all those off the wall Peep stories. Happy Easter!

Stumble Upon Toolbar